d. Create an HPC Cluster
In the previous step you connected to PCluster Manager. Now we will create a cluster using the Cluster Creation Wizard:
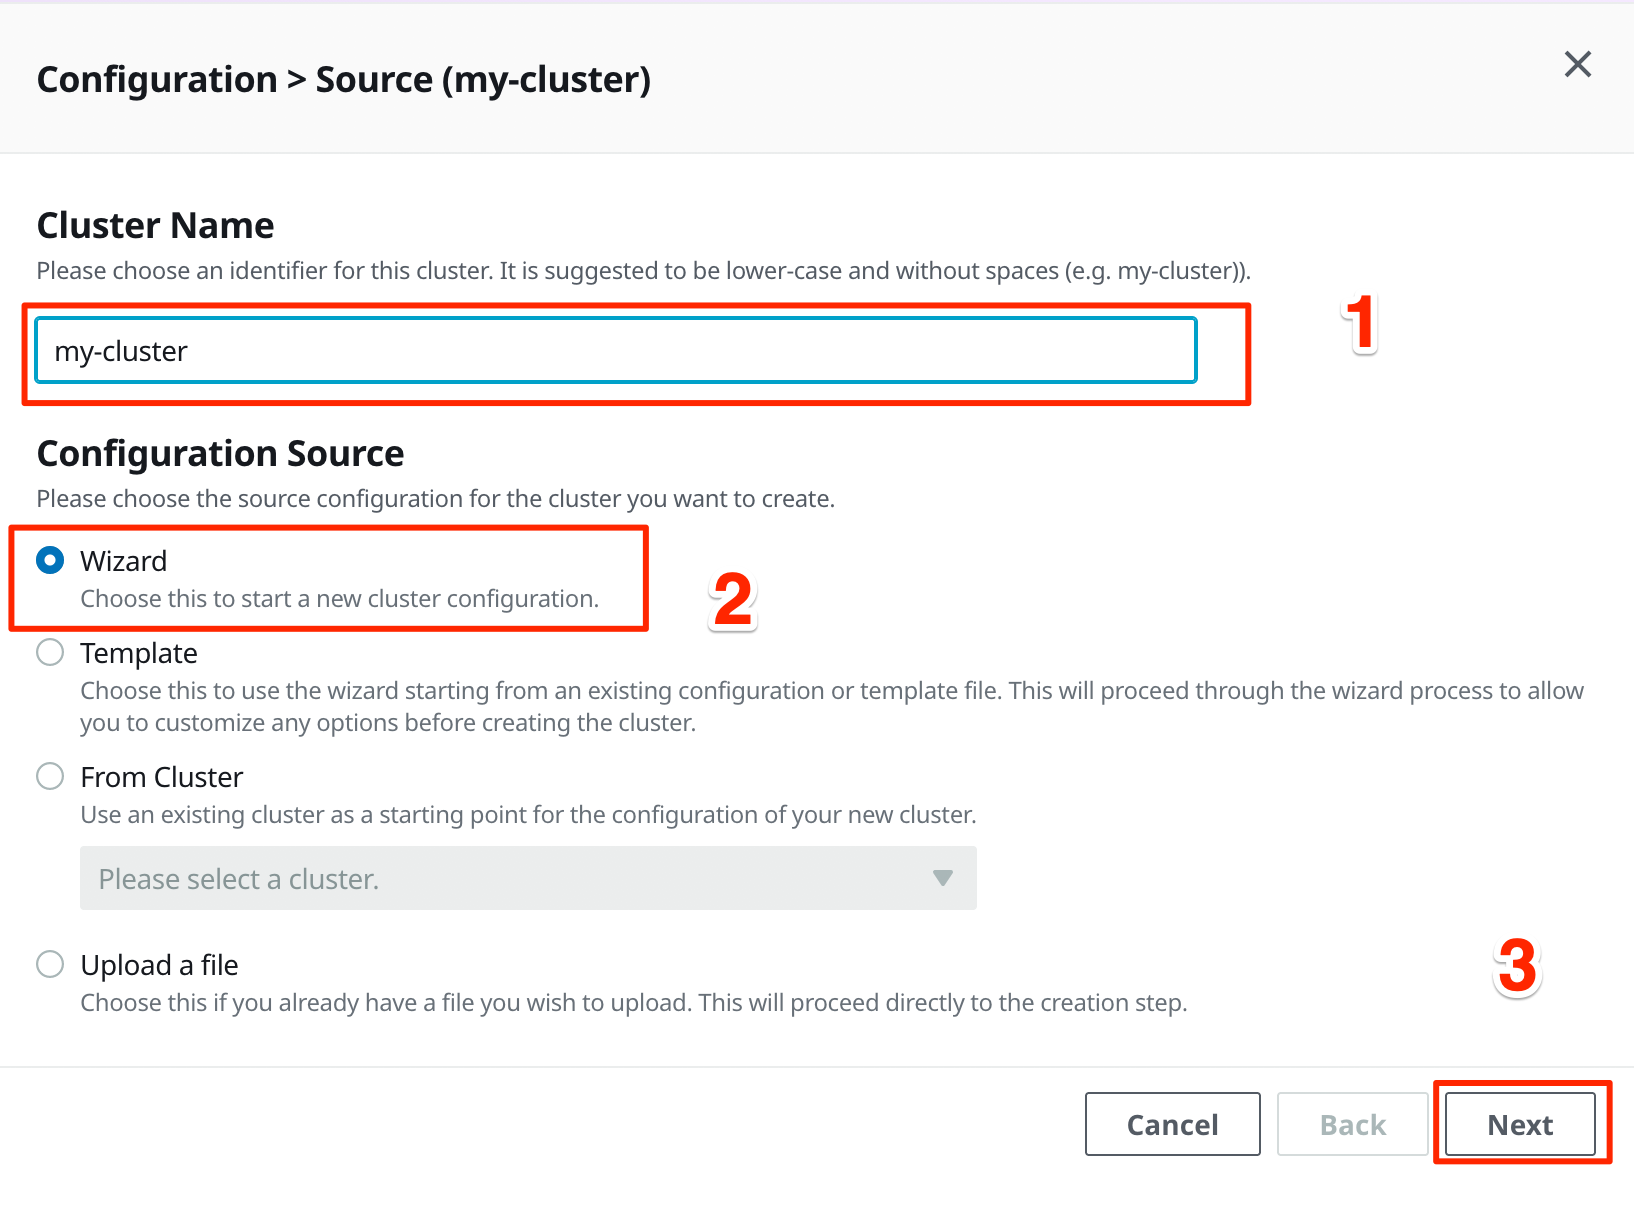
- Click on one of the two Create Cluster buttons.

- Enter the name of your cluster. Here we have chosen
my-cluster, but feel free to pick your own cluster name. Select the Wizard and Click the Next button.
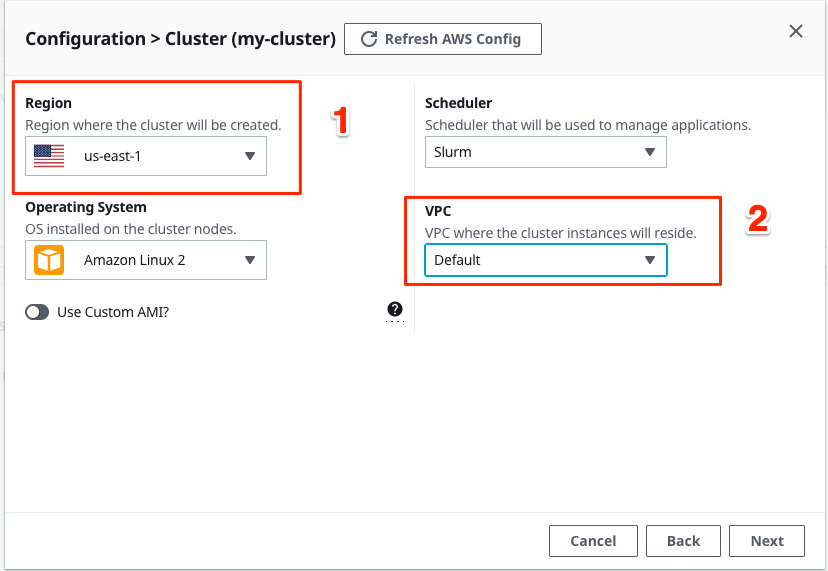
- Select the region to be us-east-1, and select a VPC.
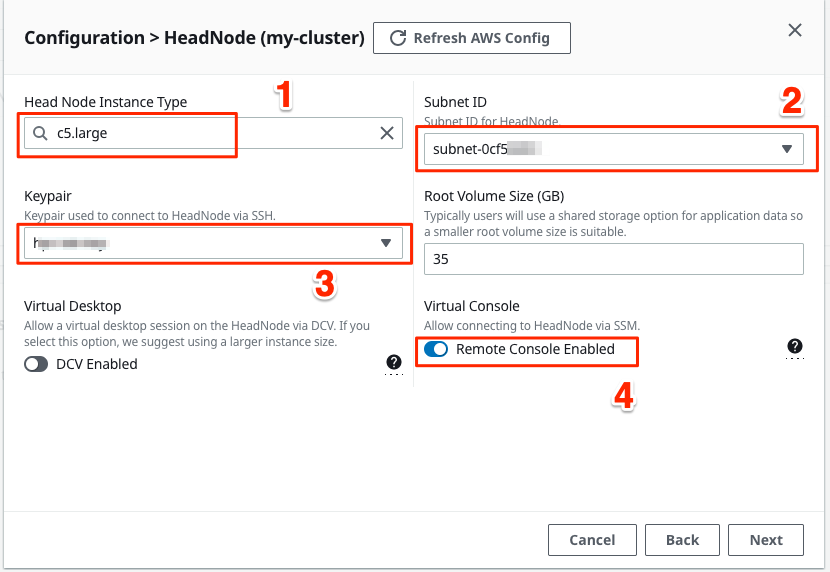
- On the next screen modify the follow values:
- Set the Head Node Instance Type to be
c5.large - Set a Subnet ID (any will do, we will verify later)
- Set the Keypair to
ee-default-keypairif running the lab at an AWS Hosted event. - Set the Root Volume Size to 35.
Once done, enable the Virtual Console as shown below and click on the Next button.
-
On the storage page of the Wizard, do not change the defaults and click on Next.
-
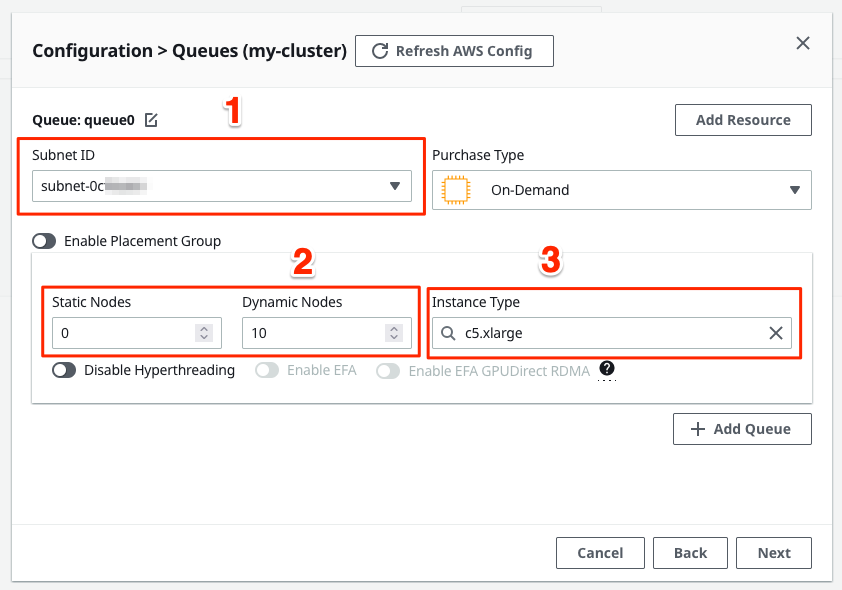
When you reach the Queues page:
- Select a Subnet ID (any will do).
- Select On-Demand for the Purchase Type if not already selected.
- Then, set the field Static Nodes to 0 and Dynamic Nodes to 10. This means that when your cluster launches it will have 0 compute nodes but that it can scale up to as many as 10 instances when jobs are submitted.
- For the Instance Type, select c5.xlarge (you can use the search field to make it easier to find this instance type).
Finish by clicking on the Next button.
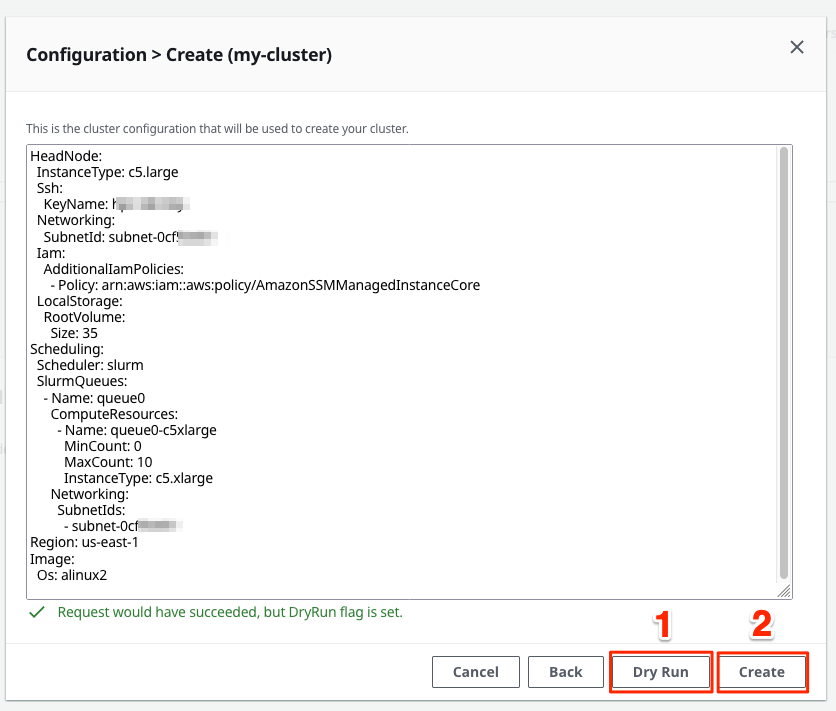
- The last Wizard page provides an overview of the configuration file that ParallelCluster will use to deploy your cluster. Your configuration file should look similar to the image below. Click on Dry Run to perform a validation of your configuration. Once your configuration has been validated, you can Click on Create to initiate creation of your HPC cluster.
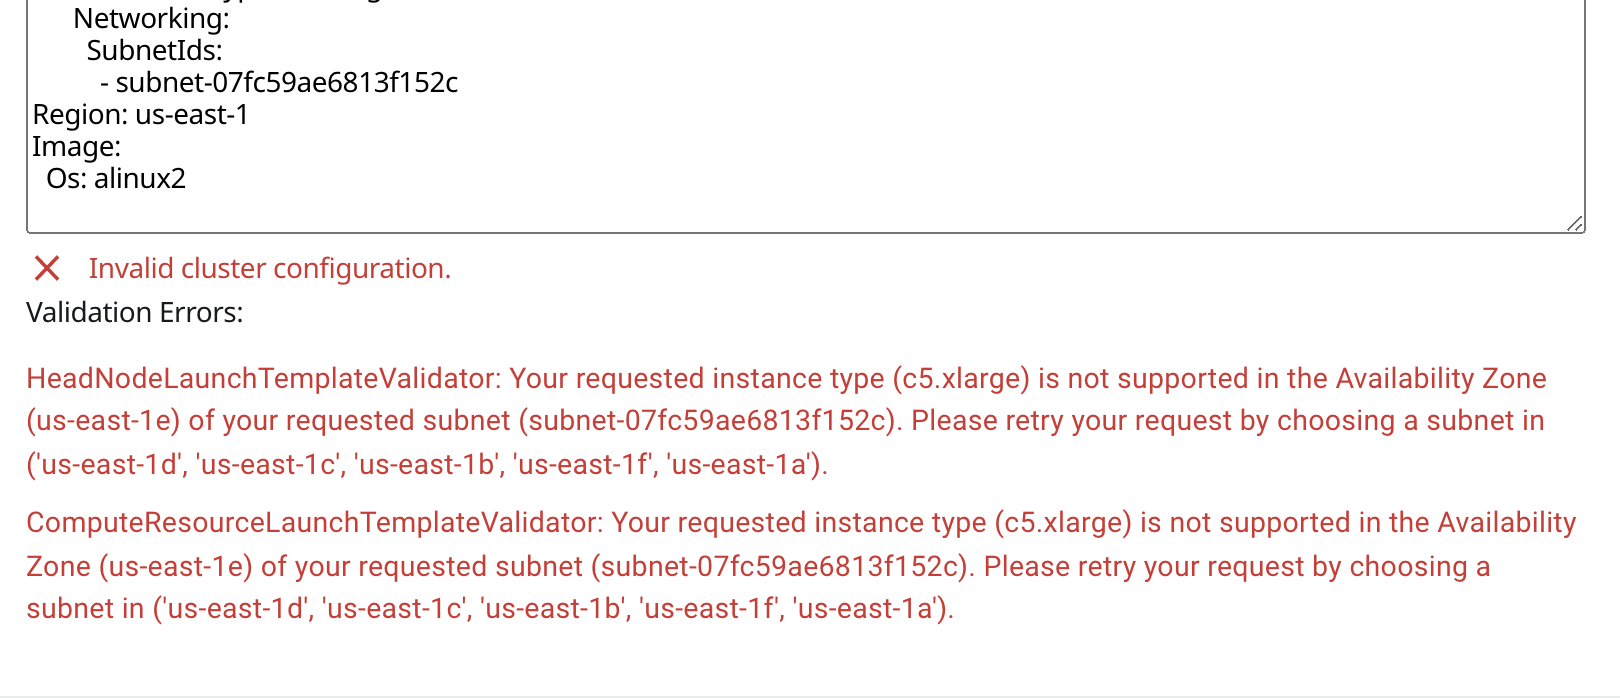
If you see the following error, go back to the subnet selection (both head and compute) and select a subnet in one of the supported Availibility Zones.
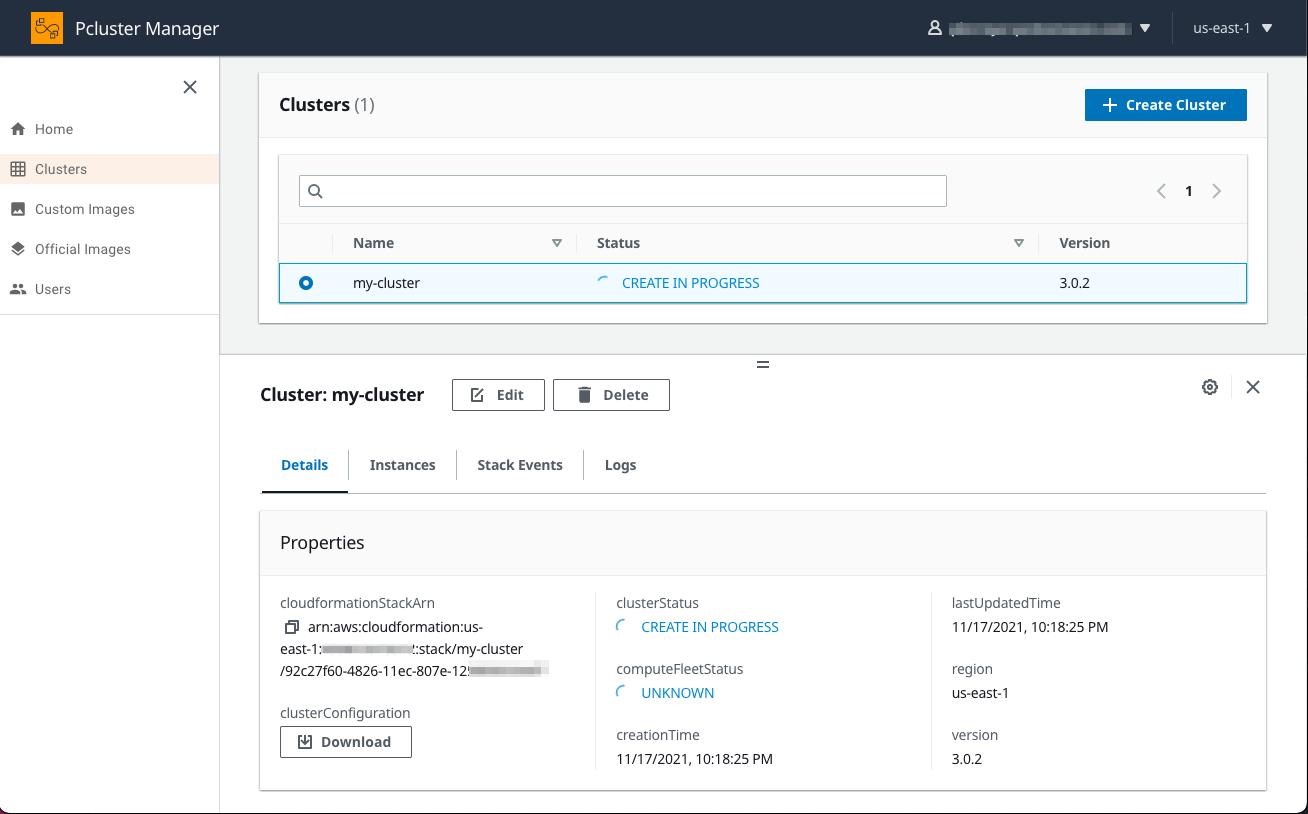
It’ll take about 5 to 7 minutes to create all of the required resources for your cluster. You can check the Stack Events tab in PCluster Manager to see the progress of your cluster creation. You can also connect to your AWS account sandbox and go to the AWS CloudFormation page. Once your cluster is created, you can move on to the next section.
