e. Connect to your Cluster
Once you’ve waited a few minutes, your cluster should now be deployed. By clicking the create button you have deployed a cluster head node along with several resources used to create instances in the cluster’s compute partition whenever jobs are submitted. The configuration you defined starts with 0 instances in this partition, and can scale up to as many as 10.
When you submit a job to your Slurm job scheduler, AWS ParallelCluster will request new instances to be provisioned using Slurm’s power management plugin for deploying instances in the cloud. If you submit a parallel job that requires the equivalent of 2 instances, then Slurm and ParallelCluster will provision those 2 instances to match that request.
If you submit additional jobs to run concurrently, then Slurm and ParallelCluster will provision additional instances until you reach your configured limit (in this case, 10 instances). Once that limit is reached, jobs will remain in the queue until slots are freed to place these jobs.
Once all jobs are processed and instances have been idle for a configurable period of time, ParallelCluster will scale down those instances. All of these lifecycle actions are fully managed, meaning users do not have to worry about needing to manually scale resources up or down, and ensuring you only need to spend for resources that are actively being used to perform work.
With all that information in mind, let’s connect to your cluster and we will start submitting some jobs so that you can test out ParallelCluster’s elasticity yourself.
- Check that your cluster is successfully deployed as labeled by 1 in the screenshot below with the state CREATE_COMPLETE. If this state is reached, Click on the small Shell icon labeled by 2.
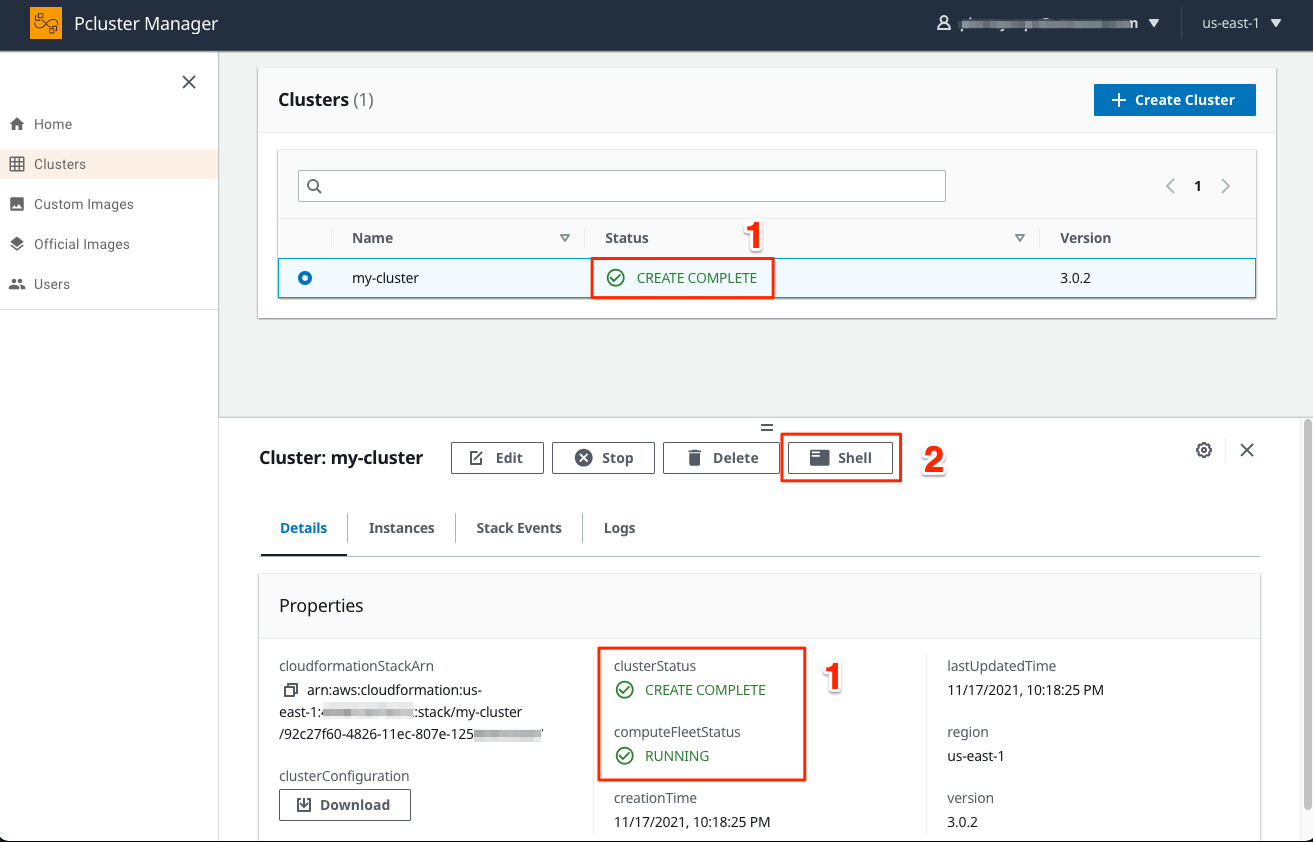
- A new tab in your web browser with access to the GNU Bash shell logged as the
ec2-user.

You are logged in your HPC system and will run some commands to get familiar with it in the next section.